4. Prepare for an Event

In this fourth part (STILL UNDER CONSTRUCTION), we will create a new copy of the map specifically for an event, rotate the map for magnetic declination, crop unused areas, add magnetic lines and scale, determine where to place the course, and create course files using a program like purple pen.
4.1 Prepare Event Copy
- Copy map and rename event_map, so we know we are only making edits for the purpose of printing and running an event.
- Rotate the map to match the current magnetic declination of the area. (you may need to look up the declination on another website). If you go to "Map --> Georeferencing" there may already be a minor rotation applied to your map. Ordinarily to rotate the map, use "Map --> Rotate Map". Both methods can be used to apply a rotation to your map, I believe.
NOTE: The reason why we only rotate the map when we are about to export a map for an event, is because rotating the map is hard to undo and it may pose problems if we try to make drastic changes to our map later on, such as expanding the map in a particular direction. When we go to import the OSM or LIDAR data, the newly imported data has not yet been rotated, so we'll have to rotate it once in an intermediate file before we import it - it is possibly much more complex to save a map that's been rotated, so we will only rotate our map right before we intend to use it for an event, and maintain an un-rotated map as our main map to edit.
- add magnetic lines to the map by adding large square area (symbol 601.2 or 601.4).
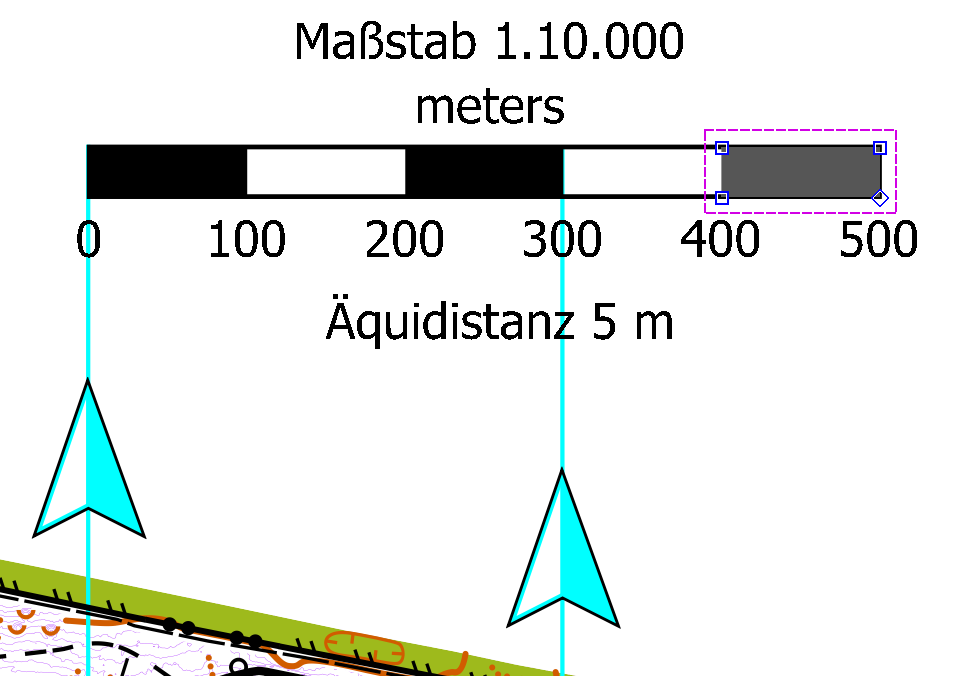
- add scale object, north arrow(s), and other markings as necessary.
NOTE: For Scale and other markings like magnetic north arrow symbol(s), you may need to create your own, using symbols for buildings and roads, and numbers. In the below example, I use a combination of Gigantic Boulder (symbol 206.1) for the areas, and Passable rock face, top line (symbol 202.4) for the borders of the scale, and Impassable cliff tag line (symbol 201.4) for the border, and Uncrossable body of water, fill (symbol 301.1) to fill the north arrows. You may use whatever symbol combination works best for you.
4.2 Crop Unused Portions
Make a final decision about what areas to crop in order to fit your map on a particular size of paper. In order to complete this step, you may want to design courses (next step) first.
4.3 Design Courses
Determine where you want your courses to be. Consider having different courses approach the same controls from different angles, and minimize sharp dog legs (where traffic only approaches/departs a control in one direction).
Inevitably, before holding an event, you will want to field check each and every individual control in the field, to make sure it is an acceptable control for the type of course you are running. It is absolutely necessary to conduct another field check, and confirm that the point is on the correct symbol, and that there is not an error in mapping. It is best to do this at least once, with others present, so there are multiple checks for this control.
When field checking, it may be useful to mark the location with some tape, so the exact point can be used if/when actual control flags are placed for an event.
4.4 Import into Purple Pen
- Create a new folder inside your park folder and call it "event_" and the date of the event i.e., "event_20250323".
- In OpenOrienteering Mapper, save an image file of the map to the event folder. It can be PNG or JPG, however the best resolution is 300 pixels per inch, for best readability. 150 may do the trick as well.
Create courses in Purple Pen or another editor.
Export files such as KML, PDF, OMAP, KMZ, etc, depending on need. If you use Maprun, you may want to export OMAP and KMZ files, but only one KMZ file will work fine (without controls on it). This part needs some editing because there are some details missing.
- Update the climb variable by counting the number of uphill contours the direct course line passes through.
- Consolidate the event files in the event folder, and share them with your print shop.
4.5 Other Tips
A few other random tips:
- Before engaging in some major task, write it down on a task list, and try to only do the top-priority tasks first. Do not waste your time making tens or hundreds of subtle changes, if those changes are insignificant at zoom level 1. (See this example for more details).
- Understand the two different ways to load data into OpenOrienteering mapper, and ask questions of other mappers before beginning some crazy time-consuming task. The first time I used LIDAR data with OpenOrienteering mapper, I didn't realize I could edit the contours, because I had incorrectly loaded them in template/image version. I spent a lot of time uselessly copying pre-existing contours from template form to object form. Once I learned I could just import the shape file, I was annoyed I had wasted that time.